

The Best Spots to Photograph Mont Saint-Michel at Sunset

Part of our Mont Saint-Michel travel guide
Mont-Saint-Michel offers very different sunset compositions depending on tide, distance, and access. The best Mont Saint Michel sunset photographs often happen when you give yourself time to walk between a few spots. If you only aim for one well known view, you may miss the light shifts. Try a couple of angles during the same sunset and see what changes.
Key Takeaways
- Use the causeway, dam, and riverbanks for clear approach views and leading lines.
- Visit the salt marshes, Roche Torin, or nearby countryside for wider compositions.
- Check the tide schedule before planning foregrounds around exposed sand.
- Arrive early enough to choose a position and watch the light change.
- Respect marked routes and avoid walking onto the bay without qualified guidance.
The Mont Saint-Michel causeway for a classic approach view
The causeway gives you the most recognizable approach to Mont Saint-Michel. The abbey sits higher than the water and the low fields nearby. The road and the bridge help guide your eye, like a path that pulls you into the scene. This makes it a solid pick for a first visit. The main subject still reads well even when the sky looks dull or cloudy.
Walk slowly rather than stopping at the first open view when looking for the best view of mont saint michel. Small changes in position can place the abbey between the bridge supports, separate it from nearby buildings, or give the foreground more space. A wider lens records the full relationship between the mount and the bay. A longer lens can compress the distant structure against the evening sky.
This approach is also useful for Mont Saint-Michel travel and for comparing changing light. Morning light hits the stone and the top towers. After that, the sky shifts into a blue dusk that makes the shapes look separate from the far line. If you want a calmer trip, it helps to use simple tips for steering clear of the largest crowds when you go.
The salt marshes near Beauvoir for reflections and open landscapes
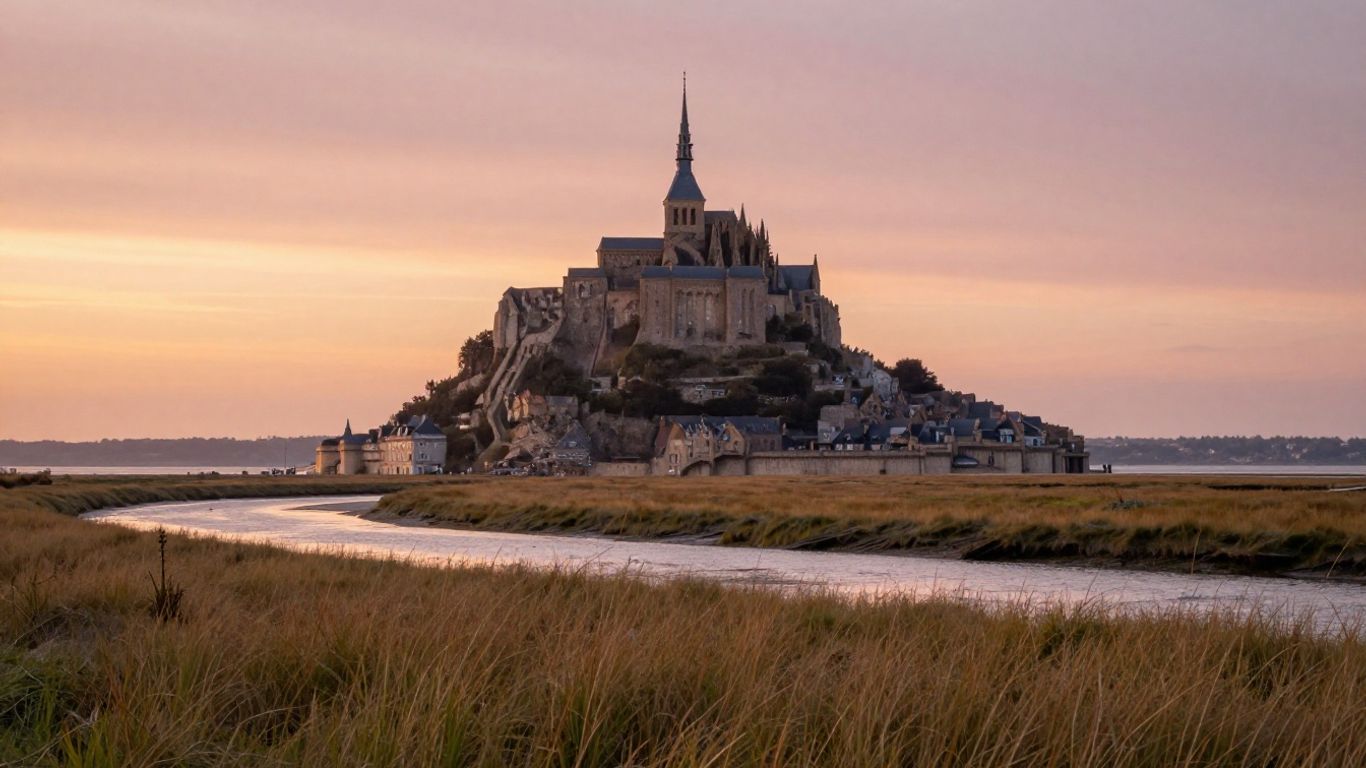
The salt marshes near Beauvoir feel more open than the island. You see thinner plant cover and drainage lines cutting through the ground. The sky looks wide, and that can make the front part of a scene feel quiet. When the air is still, you might notice soft reflections.
From this spot, the abbey looks smaller. Still, the extra distance helps the sunset photo feel like it truly belongs to the place.
After the sun is gone, scan for shallow water or damp soil. Look for places where the last colors cling to the surface. Keep the horizon straight. Do not fill the whole frame just because you can. Leave some empty space, since it is part of how the photo works. Use a long lens to pull the mount forward. Use a normal lens to match it with the marsh and the cloud shapes.
Stay on established paths and be considerate of farmland and drainage areas. The best view of Mont Saint Michel may require patience rather than movement. Since a few minutes of changing color can transform a flat scene into a layered one. These marsh views work particularly well when the sunset is soft rather than intensely orange.
The Dam of Mont Saint-Michel for panoramic sunset compositions
The dam is a practical viewpoint for a broad, elevated look across the Couesnon and toward the mount. Its open outlook lets the abbey, water, bridge, and sky share the frame without a long walk into the bay. It is also a useful location when you want to keep your setup simple.
Arrive before sunset and study both sides of the structure. One direction can hide the sun behind the hill. The other can pull in steady, warm light over the water. It also shows the nearby land clearly.
You can try a wide shot series to help. Just keep the camera at the same height each time. Also, make sure each image overlaps the one before it.
The dam area gets crowded at busy times, so make space for folks walking by and for vehicles that need to pass. Don’t squeeze your view into one tight frame. After the sun drops and the light changes, a tripod can help a lot. You can still get clear shots in the earlier evening too, if you use a quick shutter speed and keep the camera steady with good support. The changing water is often as useful as the sky for creating variation.
The Couesnon River banks for leading lines toward the abbey
The Couesnon River banks offer strong compositional structure. Curving water, grasses, paths, and embankments can guide the eye toward Mont Saint-Michel. This gives the photograph direction instead of treating the abbey as an isolated object. This is a good choice when you want the landscape to play an equal role.
Search for a bend that points naturally toward the mount, then adjust your height to control how much river enters the foreground. Getting down low makes the water and the grass stand out more. If you stand higher, you can see the bigger layout of the channels and the banks. Also, pay attention to what sits on the edge of your picture. Poles and railings can pull your eyes away from the main view.
The riverbanks also reward a sequence of exposures as the reflections change. Keep some detail in the brightest area of the sky. If the contrast is tough, try a graduated filter or shoot a couple of brackets. Aim for an image that still ties in with the land around the abbey. It should not look like a tight crop of the building.
The Caserne area for unobstructed views across the bay
The Caserne area provides accessible mainland views with a broad sightline toward Mont Saint-Michel. It is useful when you want the whole silhouette without entering the village or climbing the ramparts. The surrounding open space also makes it easier to work with different focal lengths.
Use the foreground deliberately. A path, field edge, or reflective patch can anchor the lower part of the image. While a longer lens can reduce visual clutter and make the mount feel more prominent. During a Mont Saint Michel sunset, the last direct light may strike the abbey after the nearby ground has already fallen into shadow. This creates a natural contrast.
You don’t need to keep the best view of Mont Saint Michel centered in the composition. Leave space on the side where the light is fading, or place the mount off-center against a band of clouds. Since the area is convenient for transport, it can also be a sensible starting point before walking to another viewpoint.
The Roche Torin viewpoint for a distant silhouette
Roche Torin suits photographers who want distance and atmosphere rather than architectural detail. From this perspective, Mont Saint-Michel becomes a dark, compact form against the broad bay and sky. The separation helps when the sunset produces strong gradients or dramatic cloud layers.
A long lens is useful, but don’t assume greatest magnification is always best. Include foreground texture, tidal channels, or grasses to convey distance and give the silhouette a setting. The most successful frames may come just after sunset, when the sky retains color, but the mount has become distinctly dark.
Since you are farther out from the island, pick your way and figure out when you will head back before you stop and relax. Bring a small flashlight for the trip home. Keep your gear tied down in the wind. Do not step onto shaky ground or places you are not allowed to enter. The quiet scale of this location is its main advantage.
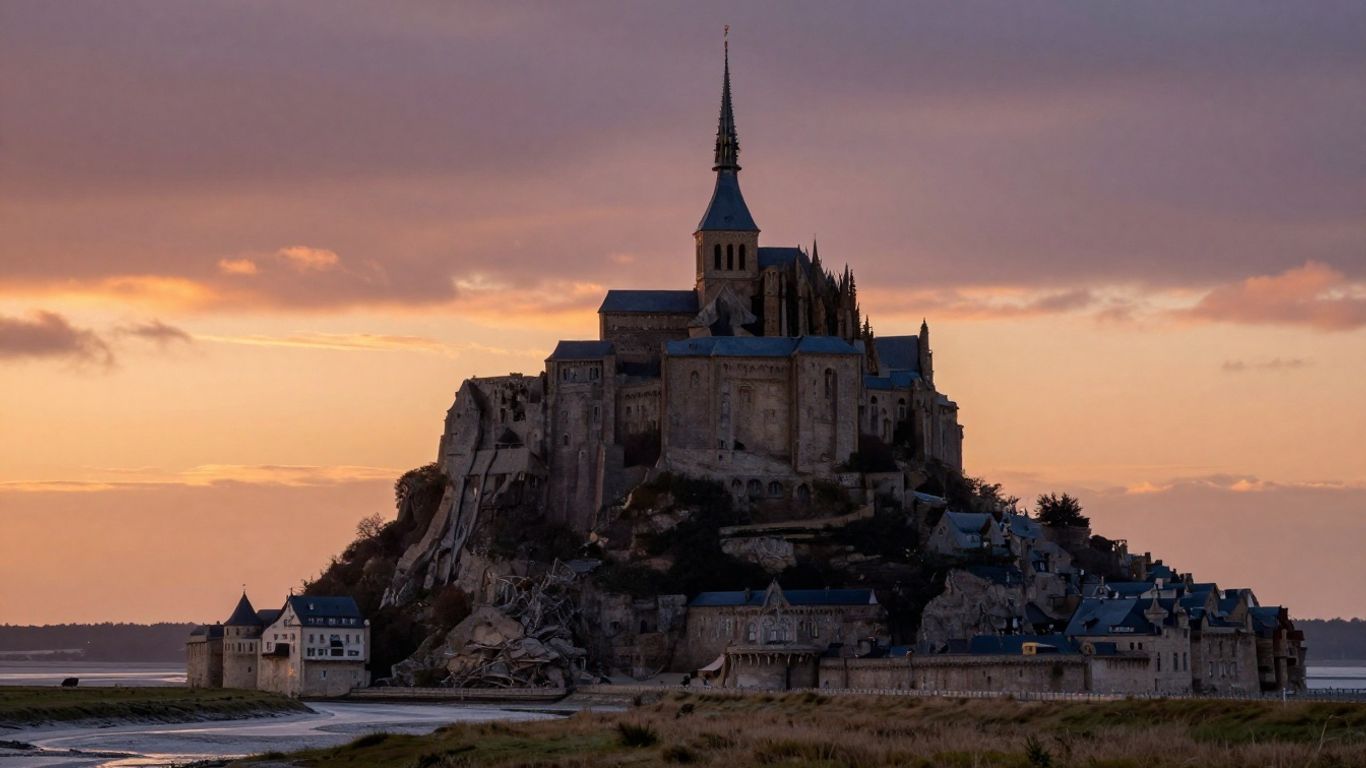
The Mont Saint-Michel viewpoint near the parking shuttle area
The viewpoint near the parking shuttle area is a convenient option for visitors working with limited time. It offers an early look toward the mount before the walk across the bridge, and the open perspective can be surprisingly effective at sunset. It is especially practical when transport schedules shape the evening.
Use the available distance to test a few compositions before committing. A moderate telephoto view can simplify the scene, while a wider frame can include the road, sky, and changing evening activity. Try to avoid placing temporary barriers or parked vehicles in the visual center unless they contribute useful scale.
This spot also works well as a fallback when clouds, wind, or fatigue make a longer route less appealing. Arrive with enough time to check the last shuttle arrangements, and don’t assume the sunset itself marks the end of the visit. The period immediately afterward can provide cooler color and softer contrast.
The bay at low tide for dramatic foregrounds
Low tide exposes channels, wet sand, and broad textures that can turn the foreground into the main subject. Mont Saint-Michel then appears beyond a changing pattern of lines and reflective surfaces. The scene can be dramatic, but it demands more preparation than a viewpoint beside a road or bridge.
Tide conditions vary, so consult current information rather than relying on a general expectation. If you are trying to time your trip with the sunset, it helps to keep an eye on tide charts. Do not think of the bay like plain open land. Mud can grab your feet, the channels can change where you step, and the water level can shift fast. A walk that looks easy can turn risky in a short time.
For a safe, deliberate composition, consider hiring a qualified local guide if you plan to enter the bay. Otherwise, photograph from a marked edge and use a longer lens to bring the channels into the frame. The strongest low-tide images often keep the foreground simple, allowing one or two lines to lead toward the mount.
The village and ramparts for warm evening details
The village and ramparts are among the Mont Saint Michel attractions. They offer a different kind of sunset photograph, focused on texture and human scale. Stone walls, narrow lanes, towers, and warm window light can add detail after the open views grow too dark. These mont saint michel attractions work well as a companion set to the broad landscape photographs.
On the ramparts, look for openings that frame the bay without losing the masonry’s character. Inside the village, watch how late light touches steps and façades rather than photographing every street straight on. A short telephoto lens can isolate a doorway or patch of worn stone while reducing distractions.
Evening crowds can drop off later. Still, the footpaths stay tight and rough. Put your tripod off to the side, not in the main way people walk. Try to keep some space so others can get through. If you stay overnight, or if you go near closing time, it can feel less busy around Mont Saint-Michel travel. You may have more time to look at the calmer spots. Guidance on a slower Mont Saint-Michel visit may help with that broader plan.
The Pontorson and Beauvoir countryside for remote sunset perspectives
The countryside around Pontorson and Beauvoir gives you the most flexibility to explore Mont Saint Michel attractions from a remote perspective. Small lanes, hedges, plain farm sheds, and far-off scenery can make Mont Saint-Michel look like it belongs to a wider part of Normandy. You might not spot the place as fast from a distance. Still, it can feel more lived-in, and you often get fewer people around.
Check the road in daylight. Find spots where you can stop legally before night comes. On rural roads, lanes can be tight, lights may be absent, and the area may feel new. A nice view ahead does not mean it is safe to park where you want. The following small decisions make the evening easier:
Confirm the route and return point before the light fades. Check whether the viewpoint crosses private farmland or a restricted path. Carry a charged phone, a small light, and clothing for changing wind. Leave extra time for finding a safe place to stop and set up.
After you finish the simple checks, look at the picture itself. If you use a long lens, it can draw the view through different layers of land. If you use a wider angle, you can set a hedge or a road at the front as a leading line. In the countryside, the scene often feels best when the sun is not too dramatic. Then the abbey fits into the wider regional view, instead of taking over the whole frame.
Conclusion
The best sunset photographs of Mont Saint-Michel come from matching the viewpoint to the conditions. Use the causeway and dam for familiarity, the marshes and countryside for space, and the bay or ramparts for texture. Check tides, allow time for the return journey, and choose a position that feels safe and workable rather than chasing one perfect frame.
Frequently Asked Questions
What is the best Mont Saint Michel sunset photography spot?
There is no single best choice for every evening. The causeway is the most recognizable. Roche Torin, the salt marshes, and the countryside provide more distance and atmosphere.
What time should I arrive for sunset photography?
Arrive at least 45 to 60 minutes before sunset so you can park, walk, assess the light, and choose a position. Add more time for distant or rural viewpoints.
Do I need to check the tide for sunset photographs?
Yes. Tide height changes the foreground, reflections, and the mount’s clear isolation. Tide tables help you decide whether to expect wet sand, channels, or more water around the island.
Can I walk across the bay to photograph Mont Saint-Michel?
The bay contains hazardous mud, channels, and fast-moving water. Do not enter it alone; use a qualified local guide if a bay crossing is part of your plan.
Which lens is most useful for photographing the mount?
A standard zoom is versatile for the causeway and dam. A telephoto lens helps with distant viewpoints, while a wide lens is useful when the sky and foreground are important parts of the scene.
Is Mont Saint-Michel worth photographing after sunset?
Yes. A Mont-Saint-Michel sunset can transition into blue hour, bringing cooler skies, illuminated buildings, and lower contrast than the final direct sunlight. It also offers a different mood from the bright golden-hour view.
Are the viewpoints suitable for photographers with limited mobility?
The dam, shuttle-area viewpoint, and several mainland perspectives are generally easier than the village streets or bay. Check current access conditions and allow extra time for uneven surfaces and transport.
Planning a trip to Mont Saint-Michel?
Compare hotels, guided tours, car hire and flights in one place.


